
This shop has been compensated by Collective Bias, Inc. and its advertiser. All opinions are mine alone. #GameDayGlory #CollectiveBias
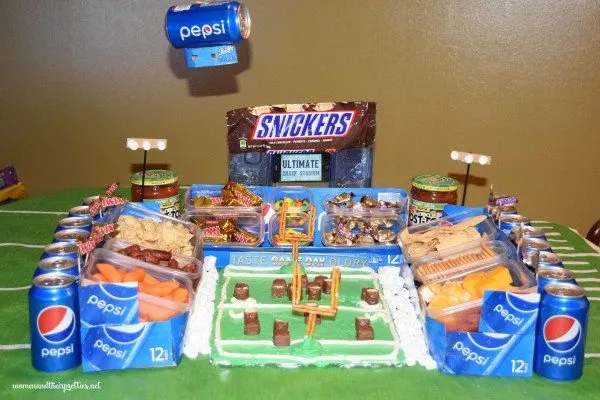
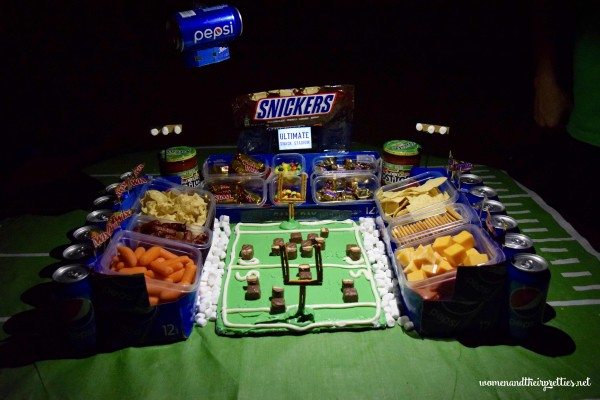
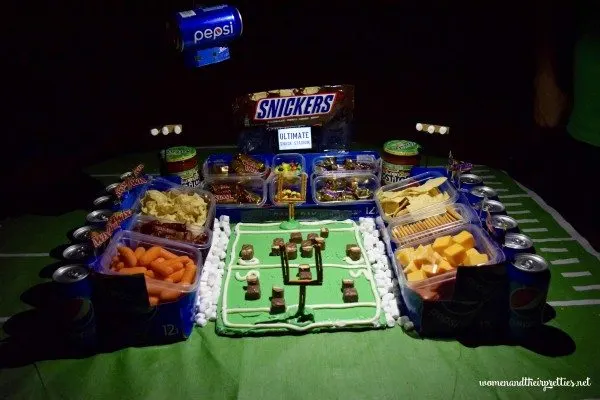
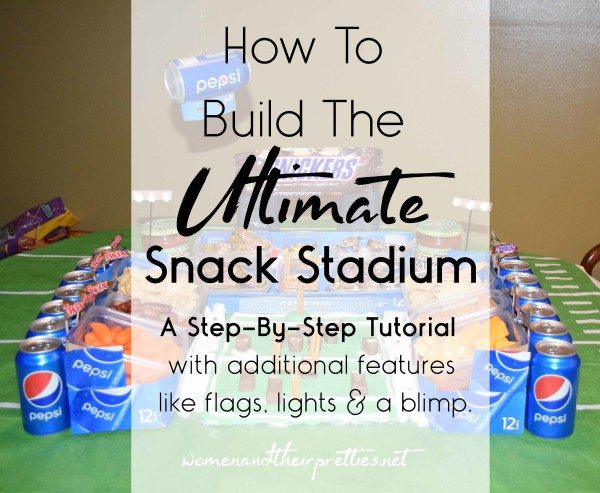
The big game is coming and I think it's important that we prepare now. If you have a huge party for the game, you know the importance of snacks and decorations. You want your party to be epic. You want it to be one to remember! A snack stadium is a new idea for me, but I wanted to make something unique and different from the average game party display. This snack stadium will be really unique because it's going to include sweet and salty snacks. 
Step 1 – Choose Your Location
Choose a location to build your stadium. Be sure your location meets the following criteria:
- Choose a flat surface. You don't want your stadium to be lopsided or to fall apart.
- Choose a location that's easily accessible, but not easy to bump into. I recommend a counter top because it cannot be moved.
- Prep the area before building your stadium. Add a cute or football-themed tablecloth. Add something underneath the stadium that will keep make clean up easy, if desired. Keep the snacks nearby to refill the stadium quickly and easily.
Step 2 – Map Out Your Plans
Gather your ideas in your head and put them on paper. Chances are that your plans will go in a different direction, but it's nice to have the idea ther for you to see.
- Draw a picture of how you want your stadium
- Set up your storage vessels before buying ingredients. This will give you an idea on what to buy, how you will display it, and if your idea will actually work.
- Make a list of the ingredients, additional vessels, and building tools that you will need.


Head to your local Walmart to find everything you will need. The sodas, chips, and salsa were all on displays right in front of the grocery area in these easy-to-find stands. If they aren't there for some reason, just head to the back up the grocery section to the chip aisle. We picked up the candy in the candy aisle at Walmart. The candy aisle is typically near the front of the store in the first few aisles.
Step 3 – Purchase Your Ingredients and Tools
All of the ingredients can be purchased at your local Walmart. Since Walmart always stocks up for the Big Game, you can look for in-store displays featuring some of the ingredients on this list. Make sure your shopping list consists of something sweet, something salty, something to dip, and something to drink! I recommend using my list because we have exactly what you'll need to build your Ultimate Snack Stadium.
- SNICKERS® Minis 40oz – Keep the wrappers as we will be making flags with those and keep the large bag to use as a board in the stadium.
- Skittles® XL 41 oz.
- Pepsi™ 12 oz. 12 packs – You will displaying your Pepsi™ cans for your guests to drink and the boxes to build your stadium
- TOSTITOS® Scoops Party Size
- TOSTITOS® Original Party Size
- TOSTITOS® Original Party Size Salsa / TOSTITOS® Medium Chunky Salsa
- Icing – green for the field and white for the lines. You can also use green food coloring with white icing for the field
- Toothpicks
- Pretzels to build the goal post
- Scissors
- Tape
- Super Glue
- Containers to hold the snacks – use a variety of sizes.

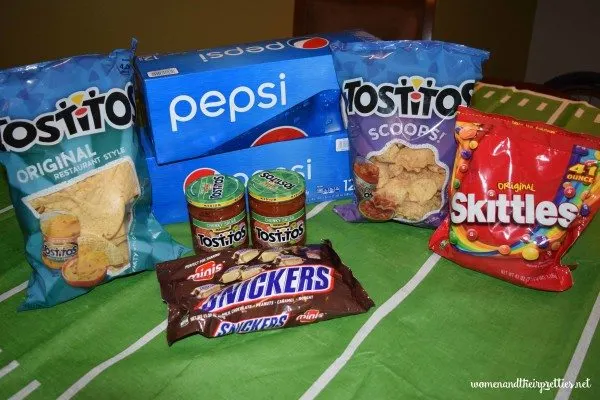
The main ingredients for your DIY Snack Stadium
Optional ingredients & tools
- Other MARS candy bars
- Easy to eat veggies like carrots and celery
- A string or fishing line of some sort for the blimp
- Disposable Tablecloth
- Marshmallows

Step 4 – Start Building
First, add your Disposable tablecloth.
Build The Stadium Seats – For this, you will need both Pepsi™ boxes, tape, and scissors.
- You will begin by removing the Pepsi™'s from the boxes. Set the cans aside for later.
- Grab your scissors and cut along one of the creases of the Pepsi™ box to lay it flat.
- Cut down the middle crease of the flat Pepsi™ box.
- Your Pepsi™ box should now be in two pieces. Pick one piece to use as the main structure for your stadium. We chose to use the side with the can for our stadium because it was more appealing.
- Now fold that section in half along the crease. You will be folding with the colorful/logo side in and the cardboard side out.
- On the side, you will notice the little flaps. Fold those in until the touch and tape them together. Do both ends. Don't worry about how they look because we will be cutting and decorating them.
- Now, cut the other panel in half along the crease. Leaving you with two separate sections.
- Now we will be cutting a strip to finish off the stand. We drew a line above and below the Pepsi™ logo as a guide to cut an even strip. We wanted the Pepsi™ logo in it to keep it colorful and appealing.
- The strip will be the taped onto the front of the other structure we built. Be sure that the colorful side is out. Tape along the sides and underneath to keep it sturdy.
- Repeat all of these steps to build the other stand.
- The third stand will be a bit different. You will be taping two panels together and then following all of the above steps. Feel free to make a 4th stand if you want a closed stadium. We kept ours open so we could take betters pics and so our guests would have easier access to the food.
- We used extra pieces from the Pepsi™ box and cut them to decorate the sides of the stands that would be showing, which was only two sides. We taped these on.
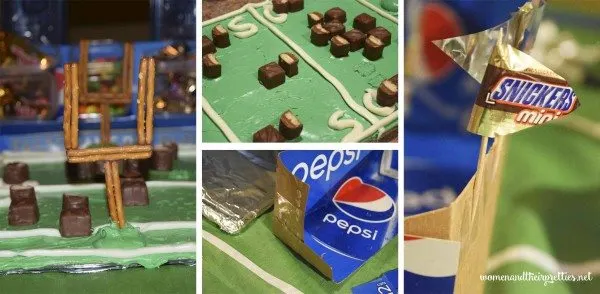
Make the flags – you will need toothpicks, SNICKERS® minis wrappers, other MARS candy wrappers (optional), scissors, and tape.
- Carefully unwrap the candies. Don't tear the wrappers because you will need them for the flags. Set aside the candy for your guests to eat later and to add as players to the field.
- Cut the wrappers into triangles. Be sure to keep the logo inside the triangle and keep a little extra at the beginning of the logo. We cut 6 flags for each side, but you can do as many as you want.
- The extra before the logo will be wrapped around and taped to a toothpick. Now you will tape the flags on the left and right stands.
- We used two different candy bars – one for each side. You can do this however you want, but we liked the idea each side routing for a different team.
Make the stadium lights – you will need marshmallows, scissors, super glue, and something to make the pole. We used a coffee stirrer, but a popsicle stick, toothpicks taped together, or even pretzel sticks would work.
- Cut a rectangle out of cardboard.
- Glue 3 marshmallows to it. We used super glue, but if you're patient enough you can use icing or cheese whiz to glue it down.
- Tape the pole to the back of the rectangle.
- Tape the pole to the inner part of the side stands.
Add the containers – you will need a variety of containers and tape. We used packing tape because it's larger and holds better.
- Add the containers to the stands at an angle. You can play around with the different container sizes to see what fits. We taped the containers to the top and bottom of the stands to keep them in place. If you have the right size of containers and you angle them just right you shouldn't need to tape them.
- Wait until the end to fill them.
Build the goal posts – you will need pretzels and super glue. Feel free to use a glue substitute
- Using stick pretzels, tape or glue them into a ‘U' shape. Set aside.
Build the field – you will need the green and white icing, a sandwich bag (unless you have the decorative icing), a base for the field, and the previously opened candy bars. We used a cutting board wrapped in foil for easy clean up.
- Spread green icing over your the base for your field. At the two ends where the goal posts will be, add small piles of the green icing. This will be to hold the goal posts.
- Add white icing to a sandwich bag. Cut out a small corner of the bag. You will use this to decorate the field with lines. It's much cheaper than buying the decorative icing.
- Add your players (SNICKERS® minis and other MARS mini or fun-size candy bars) to the field. You can choose to add two different kinds of candy bars to display the two different teams.
- Add the field to your stadium. We built ours in a different room and carried it to the field.
- Carefully place your goal posts on the field into the piles of icing that you added earlier. Hold each one for a few seconds until it's steady and in place. Keep an eye on it because you don't want it to fall and ruin your beautiful field.
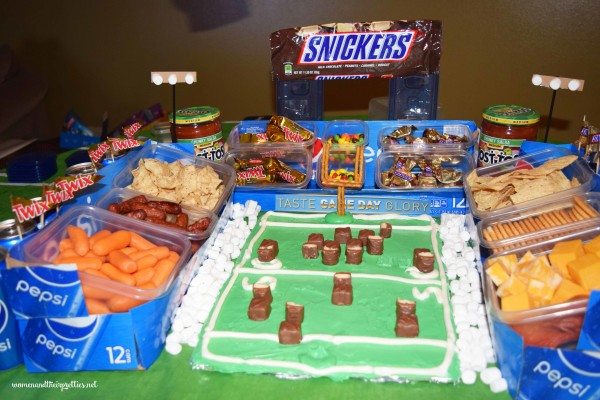

Stock your snacks – You will need Skittles®, TOSTITOS® Scoops and regular TOSTITOS®, TOSTITOS® Chunky Salsa, SNICKERS® minis, Pepsi™s, and whatever other snacks you purchased.
- Add your two jars of TOSTITOS® Chunky Salsa the end corners. We stacked ours on top of small containers to keep it east and visible.
- Fill the containers. We made the end stand a candy bar with SNICKERS® Minis, Skittles®, and other MARS candy bars. We tried to keep it colorful and thoughtful. We put the chips next to the salsa.
- We filled in the spaces between the stands and field with the marshmallows because we noticed that dipping them in icing was pretty delicious. We have toothpicks to the side for the guests the grab them and dip them. This is all a matter of preference and convenience. Your field might be larger and not have spaces in between.
- Line the outside of our field with Pepsi™ cans.
Step 5 – Build the extra decorations (optional)
Build the blimp – you will need a piece of cardboard, tape, fishing line, and an empty soda can.
- We poked a hole in the soda can to empty it, so the tab wouldn't be open. You can use an opened and empty soda can if that's easier
- Cut a strip of cardboard and folded it into a circle, taping it together.
- Next tape the cardboard onto the bottom of the soda can.
- Tape fishing line to the top of the soda can and tape the other end to the ceiling, a light, or chandelier.
- That's it! It hangs nicely over the stadium.
Build the large end sign – you will need packing tape, rectangular tupperware lids, the SNICKERS® minis bag
- Simply tape the rectangular container lids to the back of the end stand
- Tape the SNICKERS® mini bag onto the front of the lids like a sign or billboard.
- We taped a phone on the sign to display a scoreboard or digital sign. We designed a photo for ours to say “Ultimate Snack Stadium” for this tutorial.

Step 5 – Finish Decorating, Restock items, and Eat!
- That's it! You're ready to party. Keep your snacks accessible to restock them easily.
- Open the salsa jars to easily dip the chips.
- Finish any additional decorating that you'd like to do.
For more recipes and snack stadiums ideas, visit this site.
Thanks so much!
I love all the decorations you added, like the blimp, signs, and flags. Great idea! (client)
Oh my – this is so amazing! We are having a Super Bowl party and you bet I will building a snack stadium like this! I just know all of my friends and family will be super impressed. I hope it comes out half as good as yours. Thanks for the tips!!