
This post contains affiliate links.
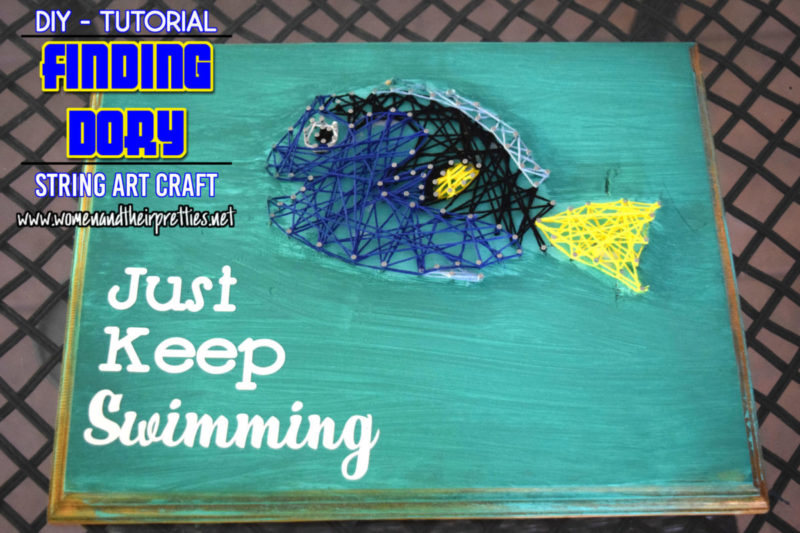
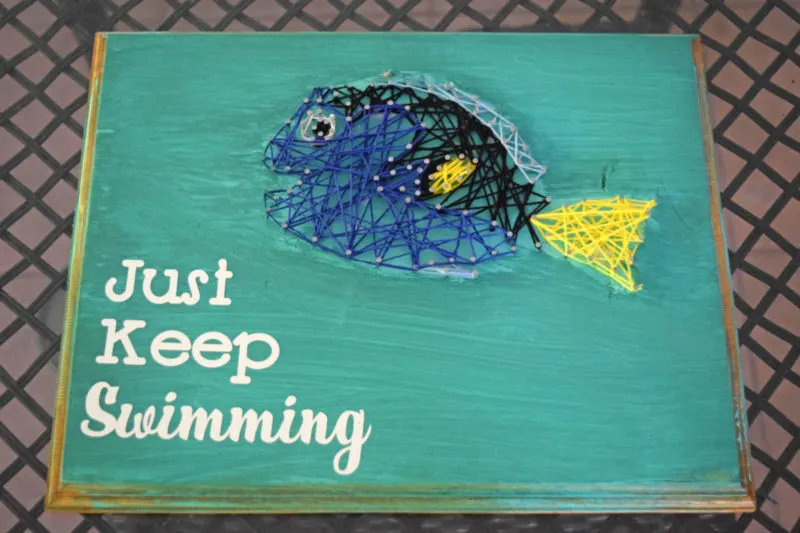
I am so excited for Finding Dory. It's been on my mind ever since it was officially announced. I've been stalking every single press release – actor announcements, sneak peeks, new trailers, etc. I've watched the Ellen Show just about every day, but that's nothing new. I've had my mind on different craft ideas for Finding Dory, but I finally settled on one – Finding Dory string art. I am new at this craft. This is my second piece, but I absolutely love it! I figured that I'd share a string art tutorial with all of you! I hope that you enjoy it. Be sure to tag me @JoyceDuboise on Instagram/Twitter if you make one. 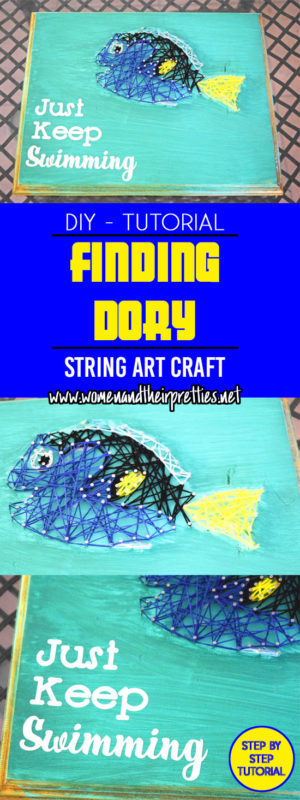

What you'll need
- A wood panel
- Nails – make sure that the head of the nail isn't too thin – it helps keep the string in place.
- Hammer
- Turquoise paint
- Paint brush
- Blue string – I bought this awesome value set from Amazon with all of the colors you need & more!
- Yellow string
- Black string
- White string
- Light blue string
- Optional: White Vinyl, Silhouette Cameo cutting machine for the quote OR you can paint a quote on yourself.
- A Dory coloring page or outline. I used one that I found on Google images. If you choose a different one than I used, be sure to find one without a lot of detail.
- Printer
- Scissors

1. Choose your paint.
I started with this Turquoise acrylic paint and covered it with a Deep Teal chalky paint. I left the side unpainted because I think that the unfinished look is fun!
2. Paint your wood panel and allow it to dry.

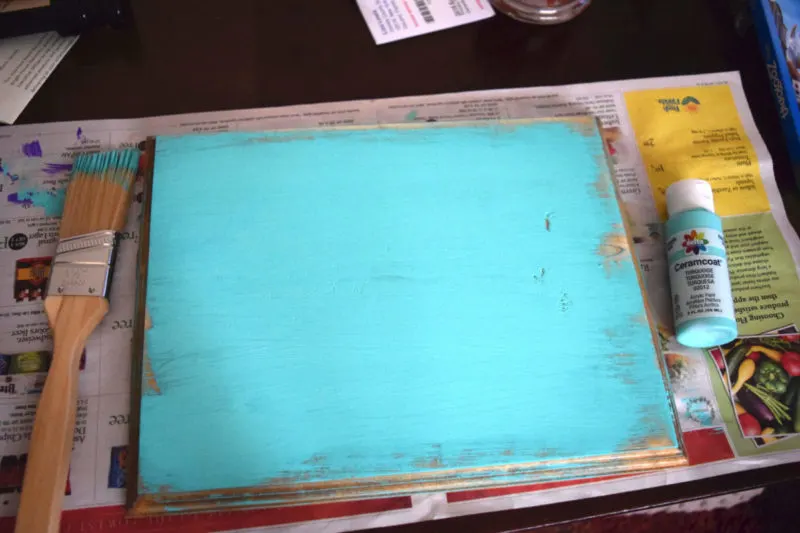
I used a wood panel from an antique shop that I scored for $2! There are wood panels that you can grab at Michaels or even cut your own piece of wood. The size is up to you.
3. Print out the Finding Dory drawing.
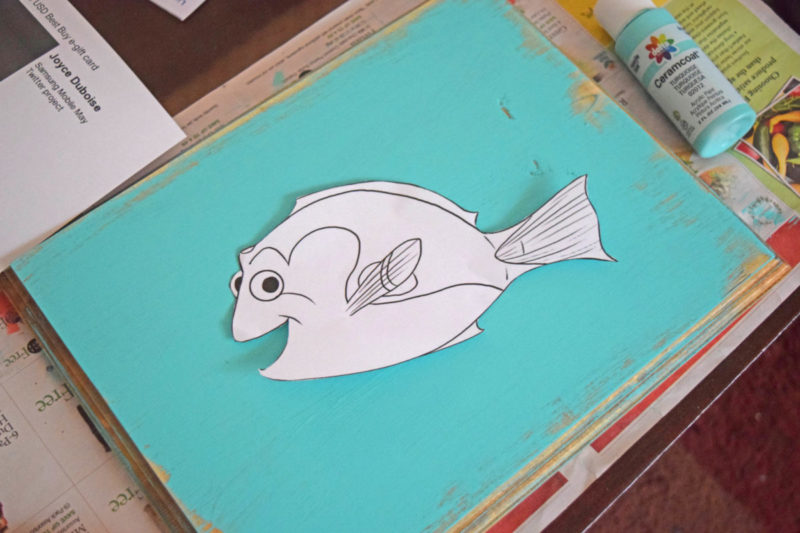

Be sure to measure your wood and choose a drawing that is an appropriate size. I used this one and resized it at about 5×7 before printing.
Cut around the outer edges of the drawing.
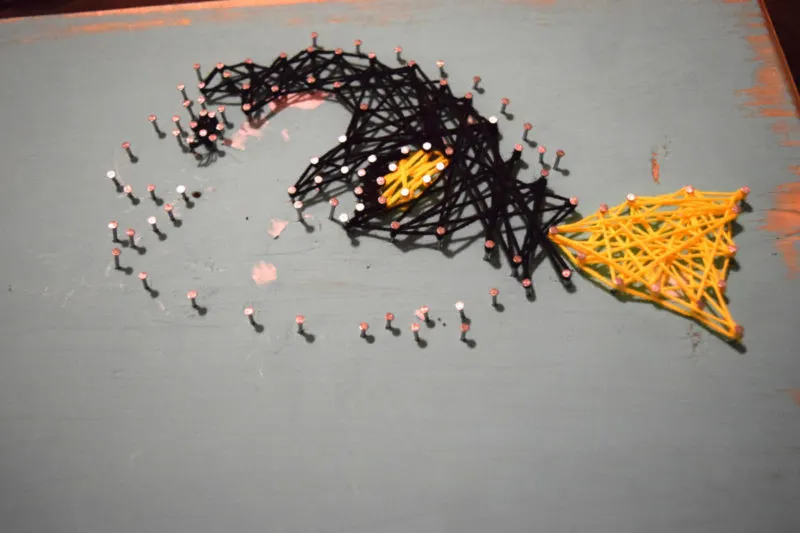
4. Nail all around the edges of Dory and section off colors.
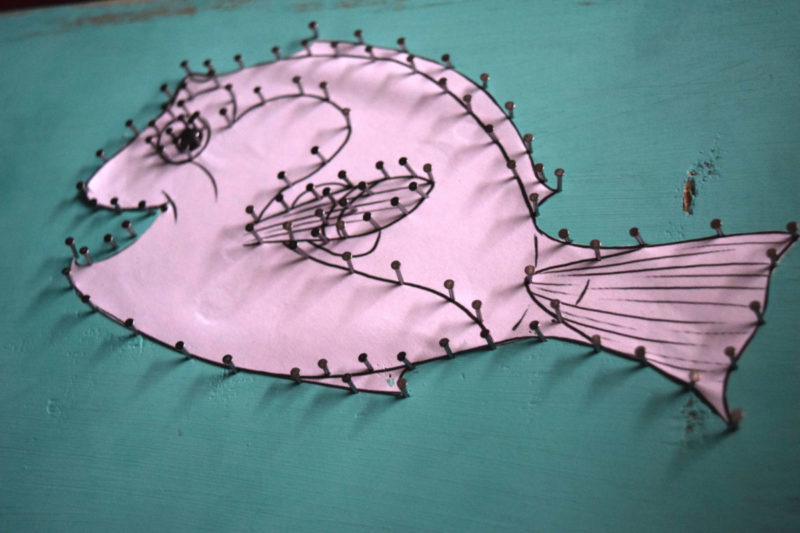
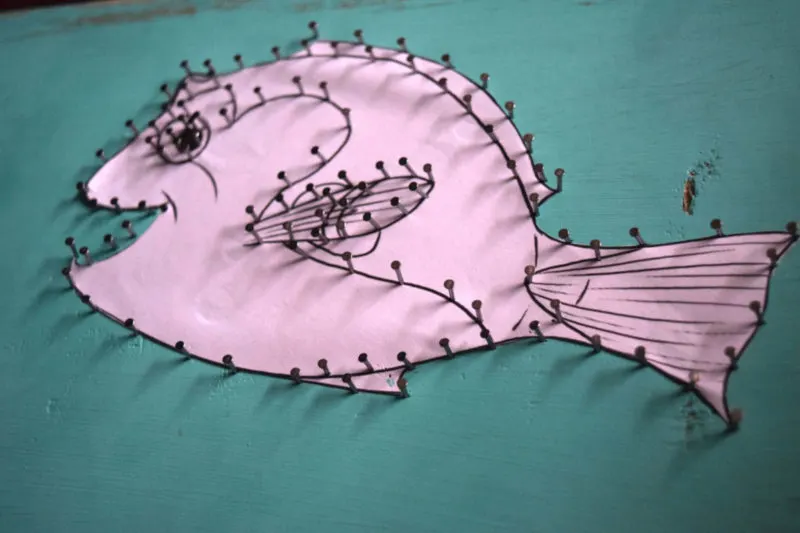
You will also want to place nails on the thick black lines that section off the colors. I looked up a picture of dory to figure out the different colors. Feel free to use my photo as a guideline. Be sure to leave the nails up enough to wrap string around them! The more nails you use, the better. I had a difficult time placing nails really close together because of my long fingernails. If I had it my way, I'd put the nails even closer together. Be sure that the nails are very secure. They shouldn't move when you touch them.
5. Remove the paper slowly.
Be careful when removing the paper because if your nails aren't secure, you will pull them right up.
6. String it!

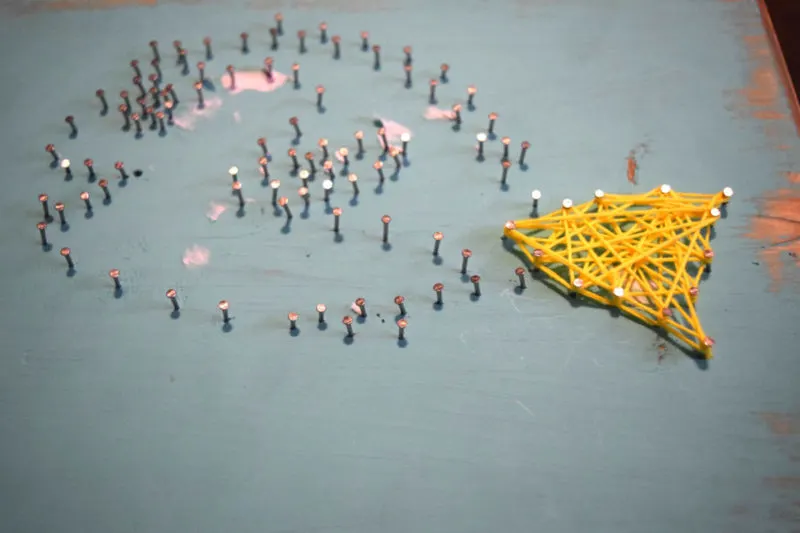
You can start with any color or section that you'd like. I chose to do mine one color at a time. I started with yellow, did the black after, then the white, next I did the light blue, then finished off with the royal blue. Be sure to use my photo as a guide for where each color should go or you can use an image of Dory from Google.
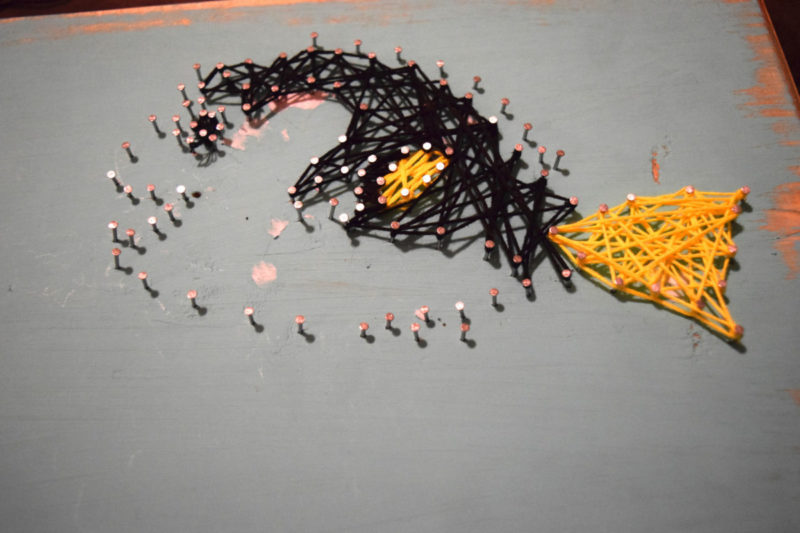
- First, make a double knot on the nail where you are starting. Cut the excess string on the end.
- Now you will run the string back and forth, from side to side, wrapping string around each nail securely.
- Run the string in any way you'd like, just make sure that it's nice and tight – if it slips off of the nail you will have to start over from that section.
- Be sure that you don't cross over any areas of a different color.
- There's not a right or wrong way to do this. You're finished when you've reached the amount of coverage that you'd like.
- When you're finished tie off the string on any nail with that color. Cut the excess string.
- Repeat these steps for each color/section.
- You will be doubling up string on the nails, so don't be afraid to do that. Some nails will have multiple colors wrapped around them – that's okay as long as the sections are correct.
7. Add a quote and hang it up.

Watch Finding Dory in theaters June 17, 2016
Disney•Pixar's “Finding Dory” reunites everyone’s favorite forgetful blue tang, Dory, with her friends Nemo and Marlin on a search for answers about her past. What can she remember? Who are her parents? And where did she learn to speak Whale? Directed by Andrew Stanton and produced by Lindsey Collins, the film features the voices of Ellen DeGeneres, Albert Brooks, Ed O'Neill, Kaitlin Olson, Ty Burrell, Eugene Levy and Diane Keaton.

[…] The “Dory thing” he is referring to is my Dory String Art Craft – check it out here. […]
Oh my gosh! I love this so much! It is adorable! Great job! 🙂